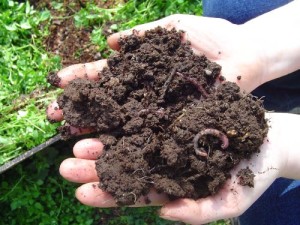
Composting is the easy way to add nutrients to soil, improve soil structure and increase the moisture-holding ability of soil. Composting recycles organic material through controlled decomposition. Organic materials are grass and yard clippings, kitchen scraps (no animal products), wood shavings, cardboard and paper. As organic materials decompose they turn into a rich, dark humus material that improves all soil types.
Compost can reduce or eliminate the use of synthetic fertilizers in your lawn or garden.
Compost helps sandy soil retain water and nutrients that would normally wash right through and it breaks up tight clay soils allowing roots to spread and oxygen to penetrate. Soils improved with compost contain beneficial microorganisms that protect plants from diseases and pests. Compost can reduce or eliminate the use of synthetic fertilizers in your lawn or garden. Better moisture retention means less watering and reduced runoff pollution – two key elements of WaterSmart gardening.
Cool & Easy Compost Recipe
Cool and Easy Composting is adding materials gradually to a bin or pile and allowing them to compost slowly with little maintenance. With this “continuous feed” approach, compost is ready in six months to two years. This practice does not destroy weed seeds, runners, or plant diseases.
Ingredients:
- Mixed yard trimmings as available, including grass clippings, flowers and stalks, leaves, weeds without seeds or spreading roots, twigs, and small branches
- Vegetable and fruit scraps and coffee grounds
- Rainwater and additional water, as needed
Tools: Pitchfork - Square-point shovel or machete , Water hose with spray head , Chipper-shredder (if composting woody material) , Compost bin (optional), Tarp, burlap, or black plastic cover (optional)
Directions:
- Set compost bin or pile where water does not puddle when it rains, preferably in a shaded spot.
- Put yard trimmings in bin or pile as they are collected.
- Chop or shred woody trimmings.
- When adding grass clippings and green garden wastes to the compost pile, mix them into the leaves and other yard materials already in the pile.
- Bury kitchen scraps under 10 inches of yard trimmings or finished compost.
- Moisten dry materials as they are added.
Optional: Cover top of compost with tarp or sheet plastic to keep it moist. When material at the bottom looks like dark, rich soil, you have compost. When convenient, move the undecomposed materials into a new pile or bin, and harvest and use the compost.
Hot & Fast Compost Recipe
Hot and Fast Composting is building and actively mixing a pile to produce disease-killing temperatures and can yield finished compost within a month. A minimum “batch” is enough to fill a plastic bin or build a pile at least 3 feet high and 3 feet in diameter. This practice destroys most plant diseases, weeds, and weed seeds.
Ingredients:
- Three to 4 or more wheelbarrows of “green” yard materials – such as grass clippings and garden debris
- Three to 4 or more wheelbarrows of “brown” materials –such as leaves, dry weeds, brush, and woody prunings
- Vegetables and fruit scraps and coffee grounds (as available)
- Water
Tools: Pitchfork - Square-point shovel or machete (optional) , Rotary lawnmower or chipper-shredder (when composting woody material or dry leaves), Water hose with spray head, Compost bin (optional), Tarp, burlap, or black plastic for covering the pile and/or mixing materials (optional), Compost thermometer (optional)
Directions:
- Pick a 4-foot by 8-foot area where water does not puddle when it rains, preferably a shaded spot.
- Cover half of the 4-foot by 8-foot area with a 6-inch layer of “brown” materials.
- Add a 3-inch layer of fresh “green” materials, and add a dash of soil or finished compost.
- Mix this layer lightly into the layer below it with a hoe or hand cultivator.
- Top with a 3-inch layer of “brown” materials and add water until it is moist.
- Repeat steps four through six until the pile is a least 3 feet high. Note: The pile should be completely covered with 4 inches or more of brown materials. Food materials should be mixed in and buried deep in the pile.
- Turn the pile over every one to two weeks with a pitchfork or shovel until the pile does not re-heat much after turning. With each turning, move dry materials from the edges into the middle of the new pile, and add water as needed.
- Let the pile cure for two weeks before using.

